Back Up iPhone & iPad Files to pCloud with FileBrowser
Automatic pCloud Backups on iOS
FileBrowser makes it easy to back up photos, documents, and folders from your iPhone or iPad to pCloud. Create automatic backup tasks to keep your files protected and up to date in the cloud. Ensure you have connected to your pCloud account with FileBrowser. If you haven't, see our Connect to pCloud Guide.
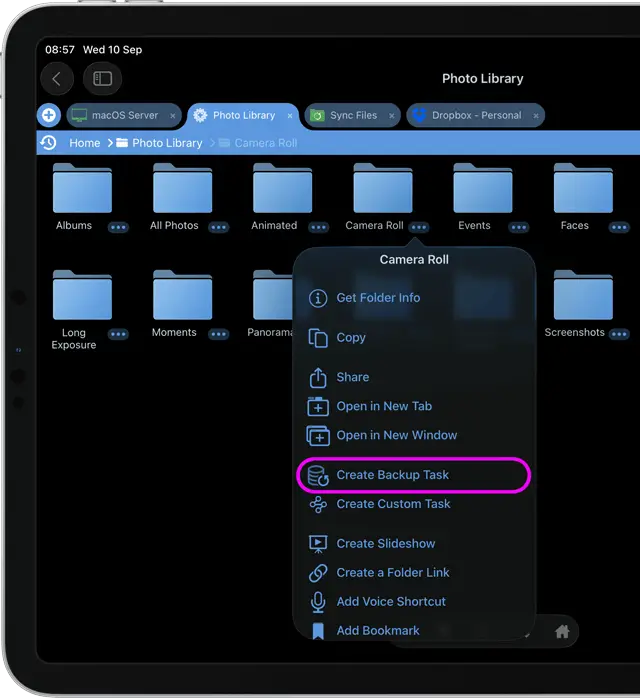
Select a Folder to Backup
Browse into a folder such as My Private Files or Photo Library using FileBrowser.
Tap the context menu for a folder and select "Create a Backup Task".
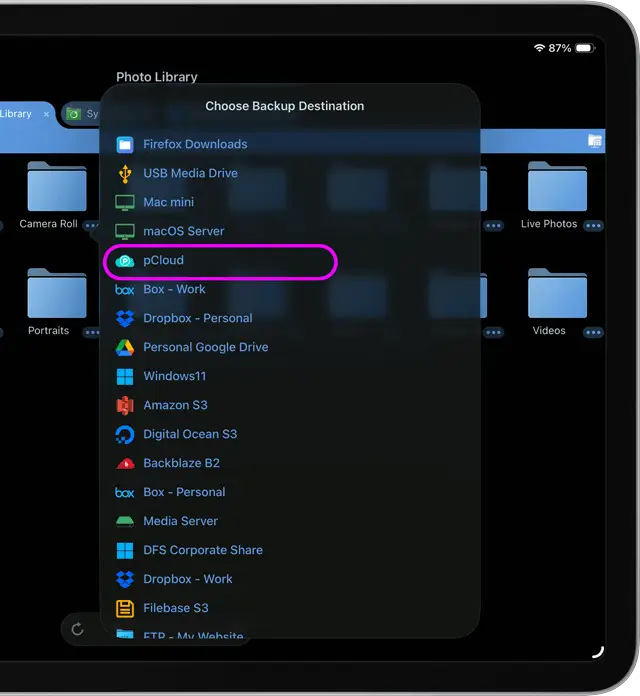
Select your pCloud Drive
Then select the location you want to back it up to for example "pCloud".
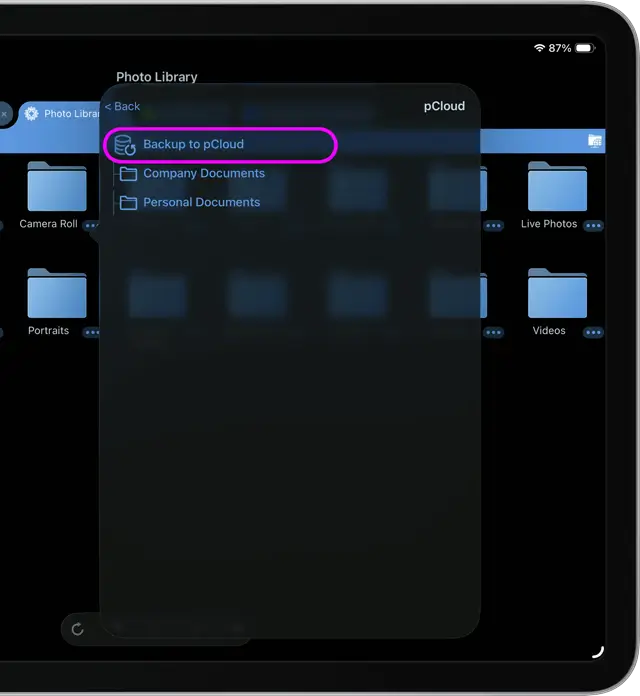
Choose the Folder to Backup to
Once you are in the chosen folder tap the top item "Backup to (folder name)".
FileBrowser will create a new sub-folder here for this backup.
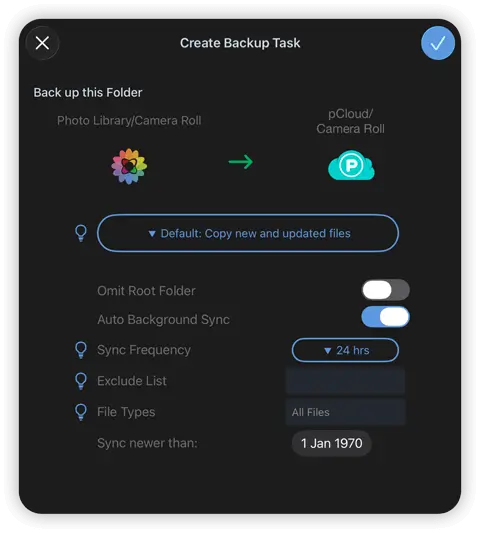
Check your Preferences
Now you can change your preferences for this Backup task here such as the backup mode, how often you want to run the pCloud backup, specify which file types to Backup or which file types to exclude from your Backups.
Once done tap the tick button to confirm your settings.
If you want to know more about the backup modes in detail see our indepth Backup Task guide page.
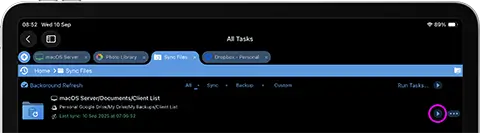
Check your Backup Task
Once setup you will see your Backup tasks under the Sync Files Section.
Tap the play icon to trigger an immediate Backup.
Tap the pCloud icon to go straight to your Backup folder.
Please note access to pCloud and the Backup feature are only available in FileBrowserGo and FileBrowser Professional.